
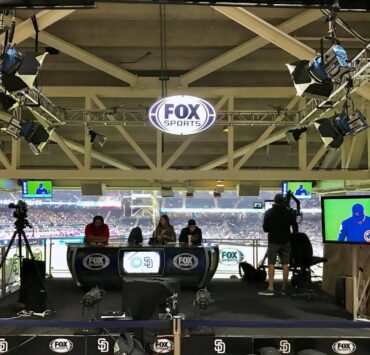
Setting Up a Professional Sports Broadcast


In the realm of sports broadcasting 고릴라티비, achieving top-notch production doesn’t necessarily demand a substantial budget. By implementing a meticulously planned setup and carefully selecting equipment, you can craft a professional sports broadcast for less than $700. This detailed guide will lead you through the fundamental elements and tactics required to deliver an exceptional broadcast while working within budget limitations.
Understanding Your Needs
Prior to delving into equipment selections, it is crucial to grasp the distinct needs of your sports broadcast 고릴라티비. Identify the nature of the sports event to be covered, the quantity of cameras required, and the standard of audio quality needed. For instance, the requirements for a high school basketball game could differ from those of a college football match.
Key Considerations:
- Event Size: Larger events may require more cameras and advanced equipment.
- Broadcast Medium: Are you streaming online, or broadcasting over local television?
- Audience Expectations: Higher production values may be necessary for a more engaged audience.
Essential Equipment for Sports Broadcasting
Setting up a professional sports broadcast involves several key pieces of equipment. Below, we detail each component and provide recommendations for budget-friendly options.
Cameras
Cameras are the cornerstone of any broadcast setup. They capture the video feed and are crucial for delivering a high-quality viewing experience.
Recommended Cameras Under $300:
- Logitech C920: Known for its HD quality and affordability. Ideal for close-up shots.
- Sony DSC-HX80: Offers excellent zoom capabilities and high-definition video.
Microphones
Audio clarity is as important as video quality. High-quality microphones ensure that commentary and ambient sounds are crisp and clear.
Top Microphones for Under $100:
- Blue Snowball iCE: A popular choice for its clear sound and ease of use.
- Audio-Technica ATR2100x: Offers both USB and XLR connectivity, making it versatile for various setups.
Audio Mixers
An audio mixer allows you to control multiple audio sources, ensuring balanced sound during the broadcast.
Affordable Audio Mixers:
- Behringer Xenyx 502: Compact and cost-effective with essential features.
- Mackie Mix8: Provides reliable performance and good audio control.
Video Switchers
Video switchers manage multiple camera feeds and transitions between them smoothly.
Low-Cost Video Switchers:
- Blackmagic Design ATEM Mini: Offers multiple inputs and simple controls.
- Roland V-1HD: Compact with a user-friendly interface for switching between sources.
Streaming Software
Streaming software is crucial for broadcasting online. It handles the encoding of video and audio and manages your live stream.
Free and Low-Cost Streaming Software:
- OBS Studio: Free and open-source with extensive features.
- Streamlabs OBS: Offers additional features and integrations, with a free version available.
Budget-Friendly Equipment Recommendations
With the basics covered, let’s dive into specific recommendations for each category of equipment. This section provides detailed suggestions to help you stay within budget while ensuring a high-quality broadcast.
Best Cameras Under $300
- Logitech C920: A highly recommended webcam known for its 1080p video quality. Great for close shots and desk setups. Price: Approximately $70.
- Sony DSC-HX80: A compact digital camera with a powerful zoom lens and full HD video recording. Price: Around $250.
Top Microphones for Under $100
- Blue Snowball iCE: Provides excellent sound quality for its price. Ideal for commentary and interviews. Price: Around $50.
- Audio-Technica ATR2100x: A dynamic microphone that delivers clear audio and can connect via USB or XLR. Price: Approximately $80.
Affordable Audio Mixers
- Behringer Xenyx 502: A basic mixer with 5 inputs, suitable for small-scale broadcasts. Price: Around $60.
- Mackie Mix8: Offers 8 channels and good build quality, making it a reliable choice. Price: Approximately $100.
Low-Cost Video Switchers
- Blackmagic Design ATEM Mini: Compact and versatile with 4 HDMI inputs, ideal for live switching. Price: Around $300.
- Roland V-1HD: Provides 4 HDMI inputs and is known for its ease of use. Price: Approximately $400.
Free and Low-Cost Streaming Software
- OBS Studio: A robust, open-source software with numerous features for streaming and recording. Free to use.
- Streamlabs OBS: Offers a user-friendly interface and additional features like overlays and alerts. Free version available.
Setting Up Your Broadcast Studio
Once you have chosen your equipment, it’s time to establish your broadcast studio. A meticulously arranged studio will elevate the quality of your broadcast and guarantee seamless operations.
Layout and Design
A well-thought-out layout can significantly improve your workflow and broadcast quality.
- Camera Placement: Position cameras to cover different angles of the sports action. Use tripods for stability.
- Audio Setup: Place microphones close to commentators and sources of ambient noise to capture clear audio.
- Switching Area: Allocate space for the video switcher and audio mixer, ensuring easy access during live broadcasts.
Connecting Your Equipment
Proper connections are crucial for a seamless broadcast.
- Connect Cameras: Use HDMI cables to link your cameras to the video switcher.
- Set Up Audio: Connect microphones to the audio mixer, and then route the mixer’s output to your streaming software or broadcast equipment.
- Integrate Video and Audio: Connect the video switcher to the streaming software or broadcast system.
Testing and Troubleshooting
Before going live, conduct thorough tests to ensure everything works correctly.
- Test Video Feeds: Verify that all cameras provide a clear picture and switch smoothly between feeds.
- Check Audio Levels: Ensure that audio from microphones is balanced and free of interference.
- Conduct Trial Runs: Perform practice broadcasts to identify any issues and make necessary adjustments.
Tips for a Professional Broadcast
To ensure a polished and engaging broadcast, consider the following tips:
Lighting and Camera Angles
- Lighting: Ensure adequate lighting to avoid dark or overly bright spots in the footage.
- Camera Angles: Use multiple camera angles to capture different aspects of the game. Position cameras to follow the action and provide a dynamic viewing experience.
Audio Quality
- Microphone Placement: Position microphones close to the commentator’s mouth and away from unwanted noise sources.
- Sound Checks: Regularly check audio levels and make adjustments as needed to maintain clarity and balance.
Graphics and Overlays
- On-Screen Graphics: Utilize visuals for showcasing scores, player names, and pertinent details.
- Overlays: Integrate overlays to elevate the visual aesthetics and offer supplementary information to viewers.
Maintaining Your Setup
Regular maintenance ensures the longevity and reliability of your broadcast setup.
- Clean Equipment: Regularly clean cameras, microphones, and other gear to prevent dust and dirt buildup.
- Check Connections: Periodically inspect cables and connectors for wear and tear.
- Update Software: Keep your streaming and broadcasting software up-to-date to benefit from the latest features and security updates.
Conclusion
Establishing a professional sports broadcast on a budget is entirely feasible with the correct strategy and equipment. Through meticulous camera, microphone, audio mixer, video switcher, and streaming software selection, you can produce a top-notch broadcast for under $700. With diligent setup and upkeep, your broadcasts will captivate, deliver clarity, and exude professionalism, ensuring a superb viewing experience for your audience.